Subfloor Preparation for Kitchen Flooring: Why It Matters More Than the Floor Itself

You can spend every dollar available on the best kitchen flooring installation products and still end up with a floor that fails in two years. The reason, more often than any other, is the subfloor. What’s underneath a kitchen floor determines whether that floor stays flat, stays bonded, and holds its shape across seasons and years. In Western North Carolina’s mountain climate, where humidity swings between summer and winter are significant, subfloor preparation for kitchen flooring matters even more than it does in more stable climates.
What Is a Subfloor?
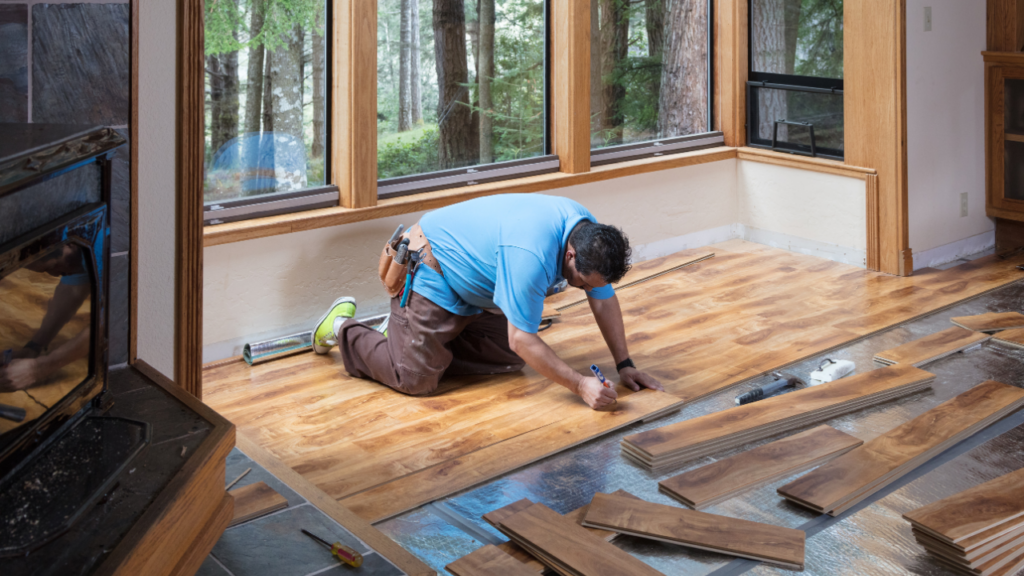
Subfloor preparation is the structural layer beneath your finished flooring. In most homes in Asheville and Hendersonville, it’s plywood sheathing nailed or screwed to the floor joists. Some older homes have boards laid diagonally across joists instead. On concrete slab foundations, the concrete itself is the subfloor.
The finished flooring, whatever material you choose, sits directly on top of the subfloor. Any problem in the subfloor shows up in the finished floor. A low spot in the subfloor creates a low spot in the floor above it. A soft, spongy section from moisture damage causes LVP or laminate to flex and eventually crack at the joints. Unlevel sections under tile cause grout lines to crack.
The subfloor is the foundation of your kitchen flooring installation. It has to be right.
Why Kitchens Have More Subfloor Issues Than Other Rooms
Kitchens take more moisture exposure than any other room in the house, which is exactly why kitchen flooring subfloor problems are so common. Sources of moisture in the kitchen subfloor include slow leaks under the sink that go undetected for months, condensation from refrigerators without proper base sealing, dishwasher leaks from door seals or hose connections, and general humidity from cooking. Over the years, even small amounts of ongoing moisture can damage the plywood subfloor sheathing, promote mold growth, and compromise the floor’s structural integrity.
In many Asheville homes built before 1980, the subfloor sheathing was thinner than current standards and may already show compression or delamination in high-traffic areas. In Hendersonville’s older housing stock, similar conditions are common. When a flooring crew evaluates a kitchen before kitchen flooring installation, the subfloor assessment is often where the most important decisions are made.
Evaluating the Subfloor: What We Look For
When Leicester Flooring’s installation team assesses a kitchen before beginning work, the subfloor preparation evaluation covers several specific conditions.
Moisture content. We test the moisture content of wood subfloors before installing wood-based products. Moisture levels above product-specific thresholds require intervention before installation can proceed. Ignoring high moisture in a subfloor preparation and installing anyway is a recipe for a floor that swells, buckles, or grows mold beneath the surface.
Structural integrity. We walk the floor methodically, pressing and testing for soft spots, squeaks, and movement. Soft spots indicate moisture damage or structural compromise. Squeaks indicate areas where the subfloor has separated from the joists and needs to be re-fastened before the flooring goes down.
Existing adhesive residue. In kitchens that previously had sheet vinyl or vinyl tile, adhesive residue on the subfloor preparation often needs to be removed or skim-coated before new flooring can go down. Some adhesives are chemically incompatible with new flooring products or create an uneven surface that affects the finished floor.
Subfloor Preparation Methods
Depending on the evaluation, subfloor preparation for kitchen flooring can involve several types of work.
Fastening loose sections. If sections of subfloor sheathing have pulled away from the joists, additional screws are added to re-secure them. This eliminates movement, squeaks, and the stress it puts on the finished flooring above.
Self-leveling compounds. Low spots and minor variations in a wood or concrete subfloor can be filled and leveled with self-leveling compound. This is poured into the low area, levels itself out, and dries to a hard, flat surface that provides a proper base for the new floor. This is a common and effective solution for kitchens in older homes.
Grinding down high spots. In some cases, particularly with concrete slabs, high spots in the subfloor need to be ground down rather than filled up. High spots under LVP or laminate cause the click-lock joints to flex and eventually fail.
Subfloor Requirements by Flooring Type
Different flooring products have different subfloor requirements for kitchen flooring installation.
LVP requires a flat, clean, dry subfloor. Most LVP products specify the 3/16-inch-per-10-feet flatness tolerance. LVP does not require a vapor barrier over wood subfloors in most situations, but concrete slab installation requires one. LVP’s rigidity means that subfloor preparation variations telegraph through the floor surface more than with softer materials. See our full LVP installation information.
Laminate has similar flatness requirements to LVP. Most laminate requires an underlayment with moisture protection, and concrete installation always requires a vapor barrier. Laminate is more sensitive to ongoing moisture exposure than LVP, which makes subfloor moisture assessment particularly important. Laminate installation requirements include specific guidance on subfloor prep.
Tile requires the most rigid subfloor of any common flooring product. Tile is inflexible — any flex in the subfloor beneath it causes the grout to crack and eventually the tile itself. Standard plywood subfloors sometimes need to be supplemented with cement board or an uncoupling membrane for tile installations. The subfloor must also meet the flatness tolerance specified by tile manufacturers, which is typically stricter than for floating floors. Tile installation considerations cover these requirements in detail.
The Cost of Skipping Subfloor Prep
We understand the temptation to minimize subfloor preparation work to reduce project cost. The problem is that skipping proper subfloor preparation doesn’t save money — it defers costs and makes them larger.
A laminate floor installed over a subfloor with too much moisture variation starts showing joint separation within a year. Fixing it means pulling up the floor, doing the subfloor work that should have been done initially, and reinstalling the floor. The cost of that remediation is nearly always higher than the original prep cost would have been.
Proper kitchen flooring subfloor preparation, done once and correctly, produces a floor that holds up for decades. The professional kitchen flooring installation process at Leicester Flooring includes subfloor evaluation as a standard step, not an optional add-on.
Summary
Subfloor preparation for kitchen flooring is the critical step that determines whether a new floor holds up over time. It involves assessing flatness, moisture content, structural integrity, and existing adhesive conditions — then correcting anything that doesn’t meet the requirements of the chosen flooring product. Kitchens present more subfloor preparation challenges than other rooms due to ongoing moisture exposure and the age of many WNC homes. Leicester Flooring’s installation teams evaluate and address subfloor conditions on every kitchen flooring project. To get started, schedule your free in-home measure or contact us.
Frequently Asked Questions
Can subfloor damage be repaired without replacing the whole subfloor?
Usually yes. Most subfloor damage is localized and can be addressed by cutting out and replacing the affected section. Full subfloor replacement is rarely necessary and is typically reserved for kitchens with extensive moisture damage.
How long does subfloor preparation take?
Minor leveling with self-leveling compound requires a 24-hour cure time before flooring can go down. Replacing a section of damaged sheathing can be completed in a few hours. More extensive work may require a separate preparatory visit before the main installation day.
Does proper subfloor preparation add to the installation cost?
It adds to the project cost when work is needed, yes. But we include it in the project scope because skipping it produces results we’re not willing to warrant. Our lifetime labor warranty requires that the foundation of the installation be sound.