How to Install Laminate Flooring: The Complete Step-by-Step Guide
Key Takeaways
- Laminate uses a click-lock floating floor method with no glue, nails, or staples required
- Laminate installation runs 30 to 50 percent faster than most other flooring types
- Four phases: preparation, layout planning, installation, and finishing
- The subfloor must be flat to within 3/16 inch over 10 feet before any plank is laid
- Professional installation at Leicester Flooring includes a lifetime workmanship warranty on every job
Laminate flooring is one of the most DIY-accessible flooring types available. The click-lock floating floor system connects planks without adhesives, nails, or staples, which means no mixing, no drying time, and no specialized trade skills. A prepared homeowner with basic tools can complete a typical room in a weekend.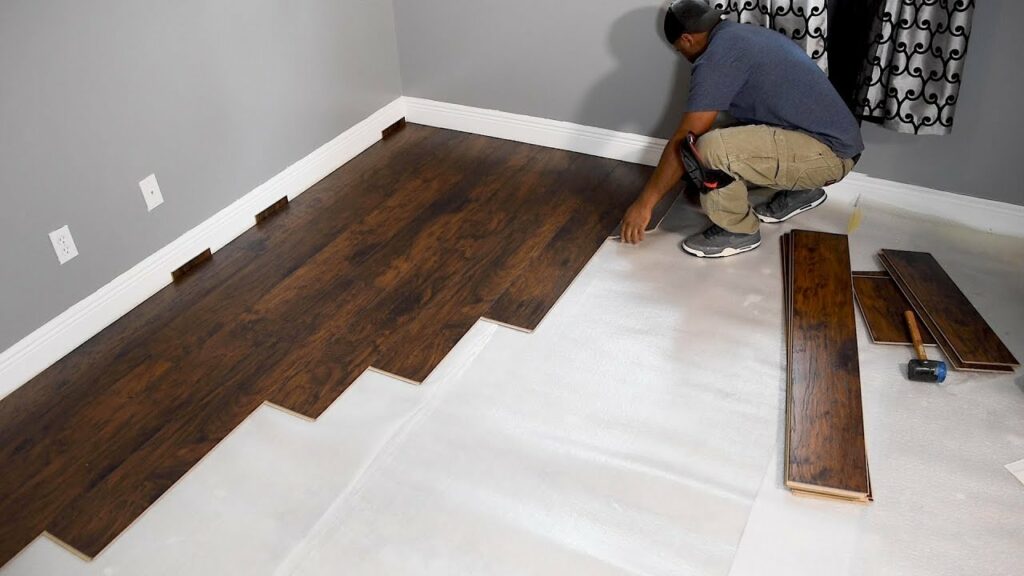
That said, the preparation steps are where most DIY installations either succeed or fail. A beautiful laminate floor laid over an uneven or damp subfloor will buckle, click underfoot, or separate at the joints within months. This guide covers every phase of the process, from the day the planks arrive to the final piece of trim, with the same attention to preparation that Leicester Flooring’s installation team brings to every job in Asheville and Hendersonville.
Phase 1: Before Any Plank Touches the Floor
The preparation phase determines everything about a laminate installation’s long-term outcome. Skipping steps here is the source of nearly every laminate floor problem.
Step 1: Acclimate the Planks
Laminate’s HDF (high-density fiberboard) core absorbs and releases moisture based on the humidity level of the room it’s in. When planks arrive from a warehouse, they’re at whatever temperature and humidity existed there. If you install them before they’ve reached the temperature and humidity of your home, they’ll expand or contract after installation, creating buckling or gaps.
Place the unopened boxes in the room where they’ll be installed for a minimum of 48 hours. Keep the room at its normal living conditions: 60 to 80 degrees Fahrenheit and 35 to 65 percent relative humidity. In Western NC homes, where seasonal humidity swings are significant, 72 hours is a safer standard. Our laminate acclimation guide covers this in detail.
Step 2: Prepare the Subfloor
According to NALFA (North American Laminate Flooring Association) standards, the subfloor must be flat to within 3/16 inch over a 10-foot span. This is non-negotiable. Laminate planks that bridge a high spot or dip will flex under foot traffic, working the click-lock joints loose over time.
Check for flatness using a 10-foot straight edge or long level. Slide it across the subfloor in multiple directions and mark every spot where a gap greater than 3/16 inch appears. Sand or grind high spots. Fill low spots with floor leveling compound and let it cure completely before proceeding.
Check moisture. Use a pin-type moisture meter to test wood subfloors. Readings above 14 percent moisture content indicate a moisture problem that needs to be resolved before installation. Concrete subfloors require a calcium chloride test or relative humidity probe. Our full subfloor preparation guide walks through every subfloor type in detail.
Check structural integrity. Walk the entire subfloor and note any squeaks, soft spots, or areas that flex under weight. Nail down any loose subfloor panels. Secure squeaky spots with screws driven below the surface.
Step 3: Install Underlayment
Underlayment provides sound cushioning, slight impact absorption, and in concrete applications, a vapor barrier against rising moisture. Your choice of underlayment depends on the specific laminate collection you’re installing and your subfloor type.
Critical rule: Many laminate collections include an attached foam pad on the back of each plank. If yours does, do not add a separate foam underlayment. Double padding creates too much flex in the click-lock joints and leads to joint separation over time.
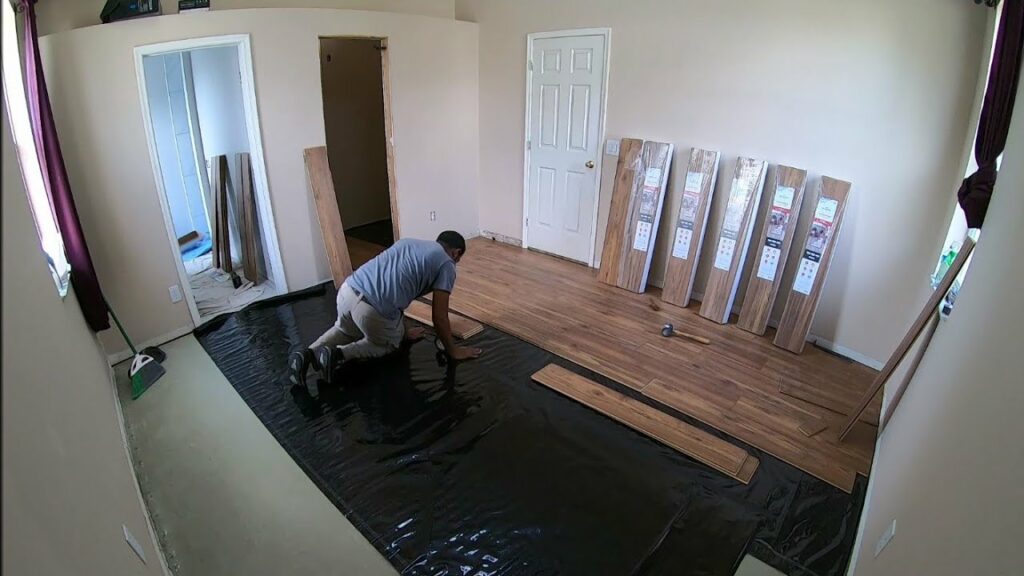
Over concrete: A polyethylene vapor barrier film (minimum 6 mil) is required regardless of whether your planks have attached pad. Overlap seams by 8 inches and tape with moisture barrier tape. Run the film 2 to 3 inches up the walls.
Over wood subfloors with no attached pad: Use a standard foam or cork underlayment (maximum 3mm to 4mm total thickness). Do not add a vapor barrier over a wood subfloor under normal conditions, as it can trap moisture against the wood.
Phase 2: Layout Planning
Taking 20 minutes for layout planning prevents the two most common visual problems in laminate installation: a floor that runs visibly out of square and thin slivers of cut plank against a wall.
Determine Plank Direction
Run planks parallel to the longest wall in the room. In rooms with natural light from windows or glass doors, running planks perpendicular to the light source reduces the visibility of seams between rows. In hallways, always run planks lengthwise.
Calculate Row Width
Measure the room width from the starting wall to the opposite wall. Divide by the plank width to determine how many rows you’ll have and how wide the final row will be. If the last row would be narrower than 2 inches, cut the first row down so the first and last rows are approximately equal width. Equal-width rows on both walls look intentional; a 1-inch sliver on one side looks like a mistake.
Snap a Chalk Line
Walls are rarely perfectly straight. Installing against a wall without checking its straightness causes the entire floor to drift off-square as you work across the room. Snap a chalk line parallel to your starting wall at the exact width of your first row, and work off the chalk line rather than the wall itself.
Phase 3: Installing the Planks
Starting the First Row
Place 3/8-inch spacers against the starting wall to establish and maintain the expansion gap. This gap is not optional. Laminate expands in humid conditions, and a floor without expansion room will buckle against the wall. The spacers get removed at the end of installation and the gap is covered by baseboards.
Position the first row of planks with the groove side facing the starting wall. Connect planks end-to-end within the row by angling one plank’s end joint into the previous plank’s end joint and pressing down to lock. Cut the final plank in the first row to fit, saving the cut-off piece to start the second row.
That saved cut-off piece is important. End joints between adjacent rows must be staggered by a minimum of 8 inches. Staggering creates structural stability across the floor and produces a more natural visual pattern. Using the cut-off from the previous row automatically creates staggering if the piece is long enough.
Installing Remaining Rows
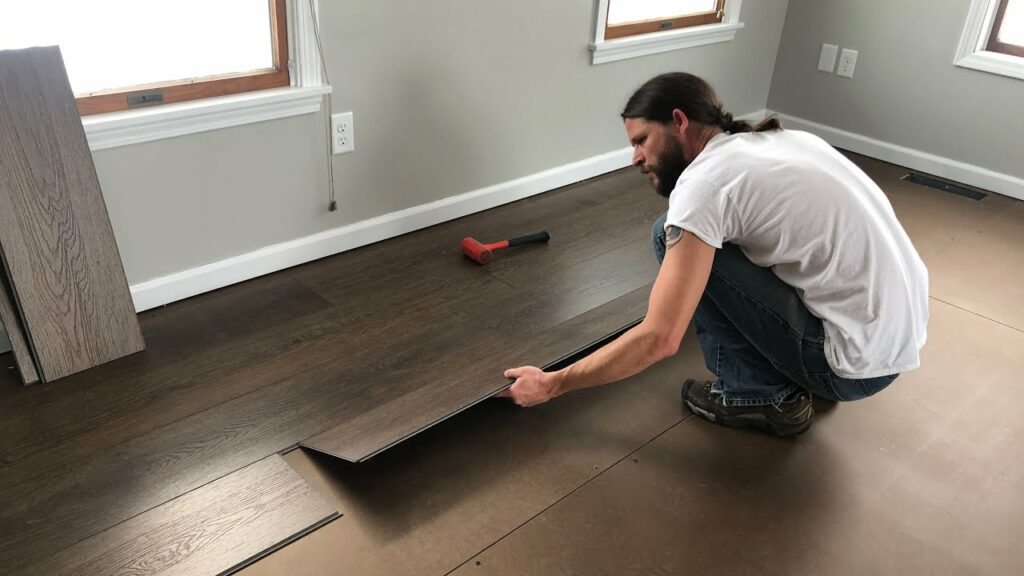
Most laminate today uses an angle-and-press connection method. Hold the plank at roughly 15 to 20 degrees, align the long side joint with the previous row’s groove, and press down to lock the joint closed. Work end-to-end across each row.
Use a tapping block, never a hammer directly on the plank edge, to close any gaps in the side joints. Hitting the plank directly damages the tongue-and-groove profile and creates joints that will never fully seat.
At every wall you reach, maintain the 3/8-inch expansion gap using spacers. This applies to side walls, end walls, doorframes, kitchen islands, and any fixed object the floor runs against.
Undercutting door casings: When a row runs into a door casing, don’t cut the plank around the casing. Instead, use a handsaw or oscillating tool to undercut the casing to the height of the plank plus underlayment. Slide the plank underneath. This produces a professional finish and is far cleaner than a notched-around cut.
Cutting Around Obstacles
For cuts around pipes, vents, and irregular shapes, a jigsaw is the right tool. Mark the cut carefully with a pencil, drill a starter hole, and cut just outside the line. Trim to final fit with a utility knife or rasp. Always allow for the expansion gap even around pipe cutouts.
For detailed cutting guidance including straight cuts, angle cuts, and how to avoid chipping the surface, see our how to cut laminate flooring guide.
Installing the Final Row
The last row requires a pull bar to seat the side joint, since there’s not enough room to angle the plank. Measure the gap from the last installed row to the wall, subtract 3/8 inch for the expansion gap, and rip the planks to that width on a table saw or with a circular saw and straight edge. Hook the pull bar over the plank edge and tap with a mallet to close the joint.
Phase 4: Finishing
Remove all wall spacers once the planks are fully installed. Install transition strips at every doorway and at every point where the laminate meets a different flooring type. Transitions protect the expansion gap from foot traffic and create a finished edge at material changes.
Install baseboards or quarter-round molding to cover the expansion gap at walls. A common mistake is nailing the trim to the floor. The trim must be nailed to the wall only, so the floor can move freely beneath it. If the trim is nailed to the floor, it acts as a clamp and the floor will buckle when it tries to expand.
Do not seal the expansion gap with caulk or filler. Blocking it prevents expansion and causes buckling.
After installation, allow 48 to 72 hours of good ventilation in the room before placing furniture. Establish proper indoor humidity levels (35 to 65 percent) to give the floor the conditions it was installed in.
Subfloor-Specific Guides
Different subfloor types have meaningfully different preparation requirements for laminate installation. Our dedicated guides cover each:
- Installing laminate over concrete covers moisture testing, vapor barrier requirements, and self-leveling compound.
- Installing laminate over a wood subfloor covers flatness correction, subfloor repair, and moisture readings.
- Installing laminate over existing vinyl explains when this is acceptable and when removal is necessary.
Room-Specific Guides
Different rooms present different installation challenges. Kitchen installations involve appliances, cabinet footprints, and moisture. Basements in WNC mountain homes involve concrete subfloors with high seasonal moisture variability.
- How to install laminate in a kitchen covers waterproof product selection, appliance clearances, and cabinet gaps.
- How to install laminate in a basement covers WNC moisture management, vapor barriers, and product selection for below-grade spaces.
Common Mistakes to Avoid
Laminate installation mistakes follow predictable patterns. Skipping acclimation, ignoring subfloor flatness, choosing the wrong underlayment, and blocking the expansion gap with trim are responsible for the majority of problems we see in floors that were installed by homeowners who didn’t know what to watch out for. Our laminate installation mistakes guide covers the 7 most common errors and how to avoid each one.
DIY vs Professional Installation
Laminate is genuinely DIY-friendly. The click-lock system was designed for ease of installation, and homeowners with intermediate skills successfully install laminate every weekend. What DIY can’t provide is a warranty on the installation itself.
Professional installation at Leicester Flooring includes a lifetime workmanship warranty. That warranty covers the installation, not just the product. If a problem develops that relates to how the floor was installed, it’s covered. That kind of protection has value particularly in older WNC homes where subfloor conditions are unpredictable.
Our installers have worked in Western NC homes for over 50 years and have seen every subfloor condition the mountains produce: older homes with subfloor damage, crawl-space moisture intrusion, unlevel slab pours from decades-old construction. Knowing how to handle those conditions before the first plank goes down is what separates a floor that lasts 25 years from one that needs replacement in five.
For a full comparison, read our DIY vs professional laminate installation guide.
Choosing the Right Laminate to Install
The installation process is the same regardless of which laminate brand or collection you choose, but the product you select affects the long-term outcome. AC rating determines how durable the wear layer is. The presence or absence of edge-sealing technology determines how well the floor handles moisture at the joints.
Leicester Flooring carries American-made laminate from Pergo, Shaw, Mohawk, and Mannington across a range of AC ratings and price points. Browse our laminate flooring options to see what’s available, or visit our Asheville showroom or Hendersonville location to compare samples in person. We also offer a room visualizer tool to see how different laminate styles look in your actual space.
Frequently Asked Questions
How long does laminate flooring installation take?
A 200-square-foot room takes an experienced DIYer approximately six to eight hours including subfloor preparation and trim. Larger or more complex rooms with multiple obstacles take longer. A professional crew from Leicester Flooring typically completes a room in a single day.
What tools do I need to install laminate flooring?
The essential tools are a miter saw or circular saw, jigsaw, tapping block, pull bar, rubber mallet, tape measure, chalk line, moisture meter, and 3/8-inch spacers. Our complete tools list for laminate installation covers each tool’s purpose.
How much laminate do I need to buy?
Measure your room’s square footage and add 10 percent for waste from cuts. In rooms with diagonal or herringbone patterns, add 15 percent. Always buy a little extra from the same production run and store the remaining planks in case a plank needs future replacement.
Can laminate flooring be installed in any room?
Laminate can be installed above grade, on grade, and below grade (basements). It can go over concrete, wood, or existing vinyl. It cannot be installed in full bathrooms, saunas, or outdoor spaces. For high-moisture rooms like kitchens and laundry areas, use a waterproof or water-resistant laminate collection with sealed joint technology.
What is the expansion gap and why does it matter?
Laminate expands when humidity rises and contracts when humidity falls. Without a gap around the perimeter, an expanding floor has nowhere to go and buckles against the walls or cabinetry. The standard gap is 3/8 inch (9.5mm) and is required at all fixed objects. It’s covered by baseboards or quarter-round trim and is invisible in a finished installation.
Does laminate flooring need to be maintained after installation?
Yes, though the maintenance is minimal. Use a pH-neutral cleaner with a damp (not wet) mop. Avoid steam mops, oil-based soaps, and ammonia-based products, all of which damage the wear layer over time. Our laminate care and maintenance guide covers the full routine.
Laminate flooring installation rewards preparation and patience. The click-lock system itself is straightforward, but the work that happens before the first plank goes down is what makes a floor that lasts for decades rather than years. If you’d rather have that preparation handled professionally, get a free in-home estimate from Leicester Flooring and our team will evaluate your subfloor, recommend the right product, and install it with a lifetime workmanship warranty behind the work.